


There were nay-sayers a-plenty when we announced our plan to build a house out of straw on the top of the hill at our Mooliabeenee Farm – including family members who warned of a terrible fire risk and vermin invasion – not to mention the inevitable reference to the three little pigs.
Ironic really, when straw, or cob-building has been around since the 11th century, and some good examples of homes which have stood for over 500 years can we found in places like Brittany in France, and Devon in the UK – where the saying ‘All cob wants is a good hat and a good pair of shoes’ originated.
It’s good advice, and quite frankly the most important thing to keep in mind when building with straw bale as water penetration is your worst nightmare ( that and arc welders – but a bit more about that later).
Of course straw bale building as we know it in Western Australia didn’t originate until 100 years ago, when mechanical balers took over from traditional methods and created the wonderful rectangular bale – a golden brick if you will. It’s different to cob in that the bales are stacked before being sprayed and sealed, instead of the straw being mixed into the mud.
It’s also important to note that straw bale is straw – not hay which may contain grain (and encourage the dreaded vermin). We ordered our bales from a local contractor who was familiar with the tightness in the bale required for building as opposed to stock.
Without a lot of funds for our straw bale project, we kept it simple. A typical hay shed in style. The outcome, a striking yet basic structure is both connected to the landscape and commanding in its stature.
A kit shed on a concrete slab formed the basic structure and was erected in just a day. At 5.5 m to the apex it was high enough for a loft, and at 6 x 12m in plan, offered a generous enough space for a large, north facing kitchen and a living and dining room extension to our existing home. It would actually be a perfect home for two with the large loft as a bedroom, but at this point the space makes a beautiful office with exceptional views.
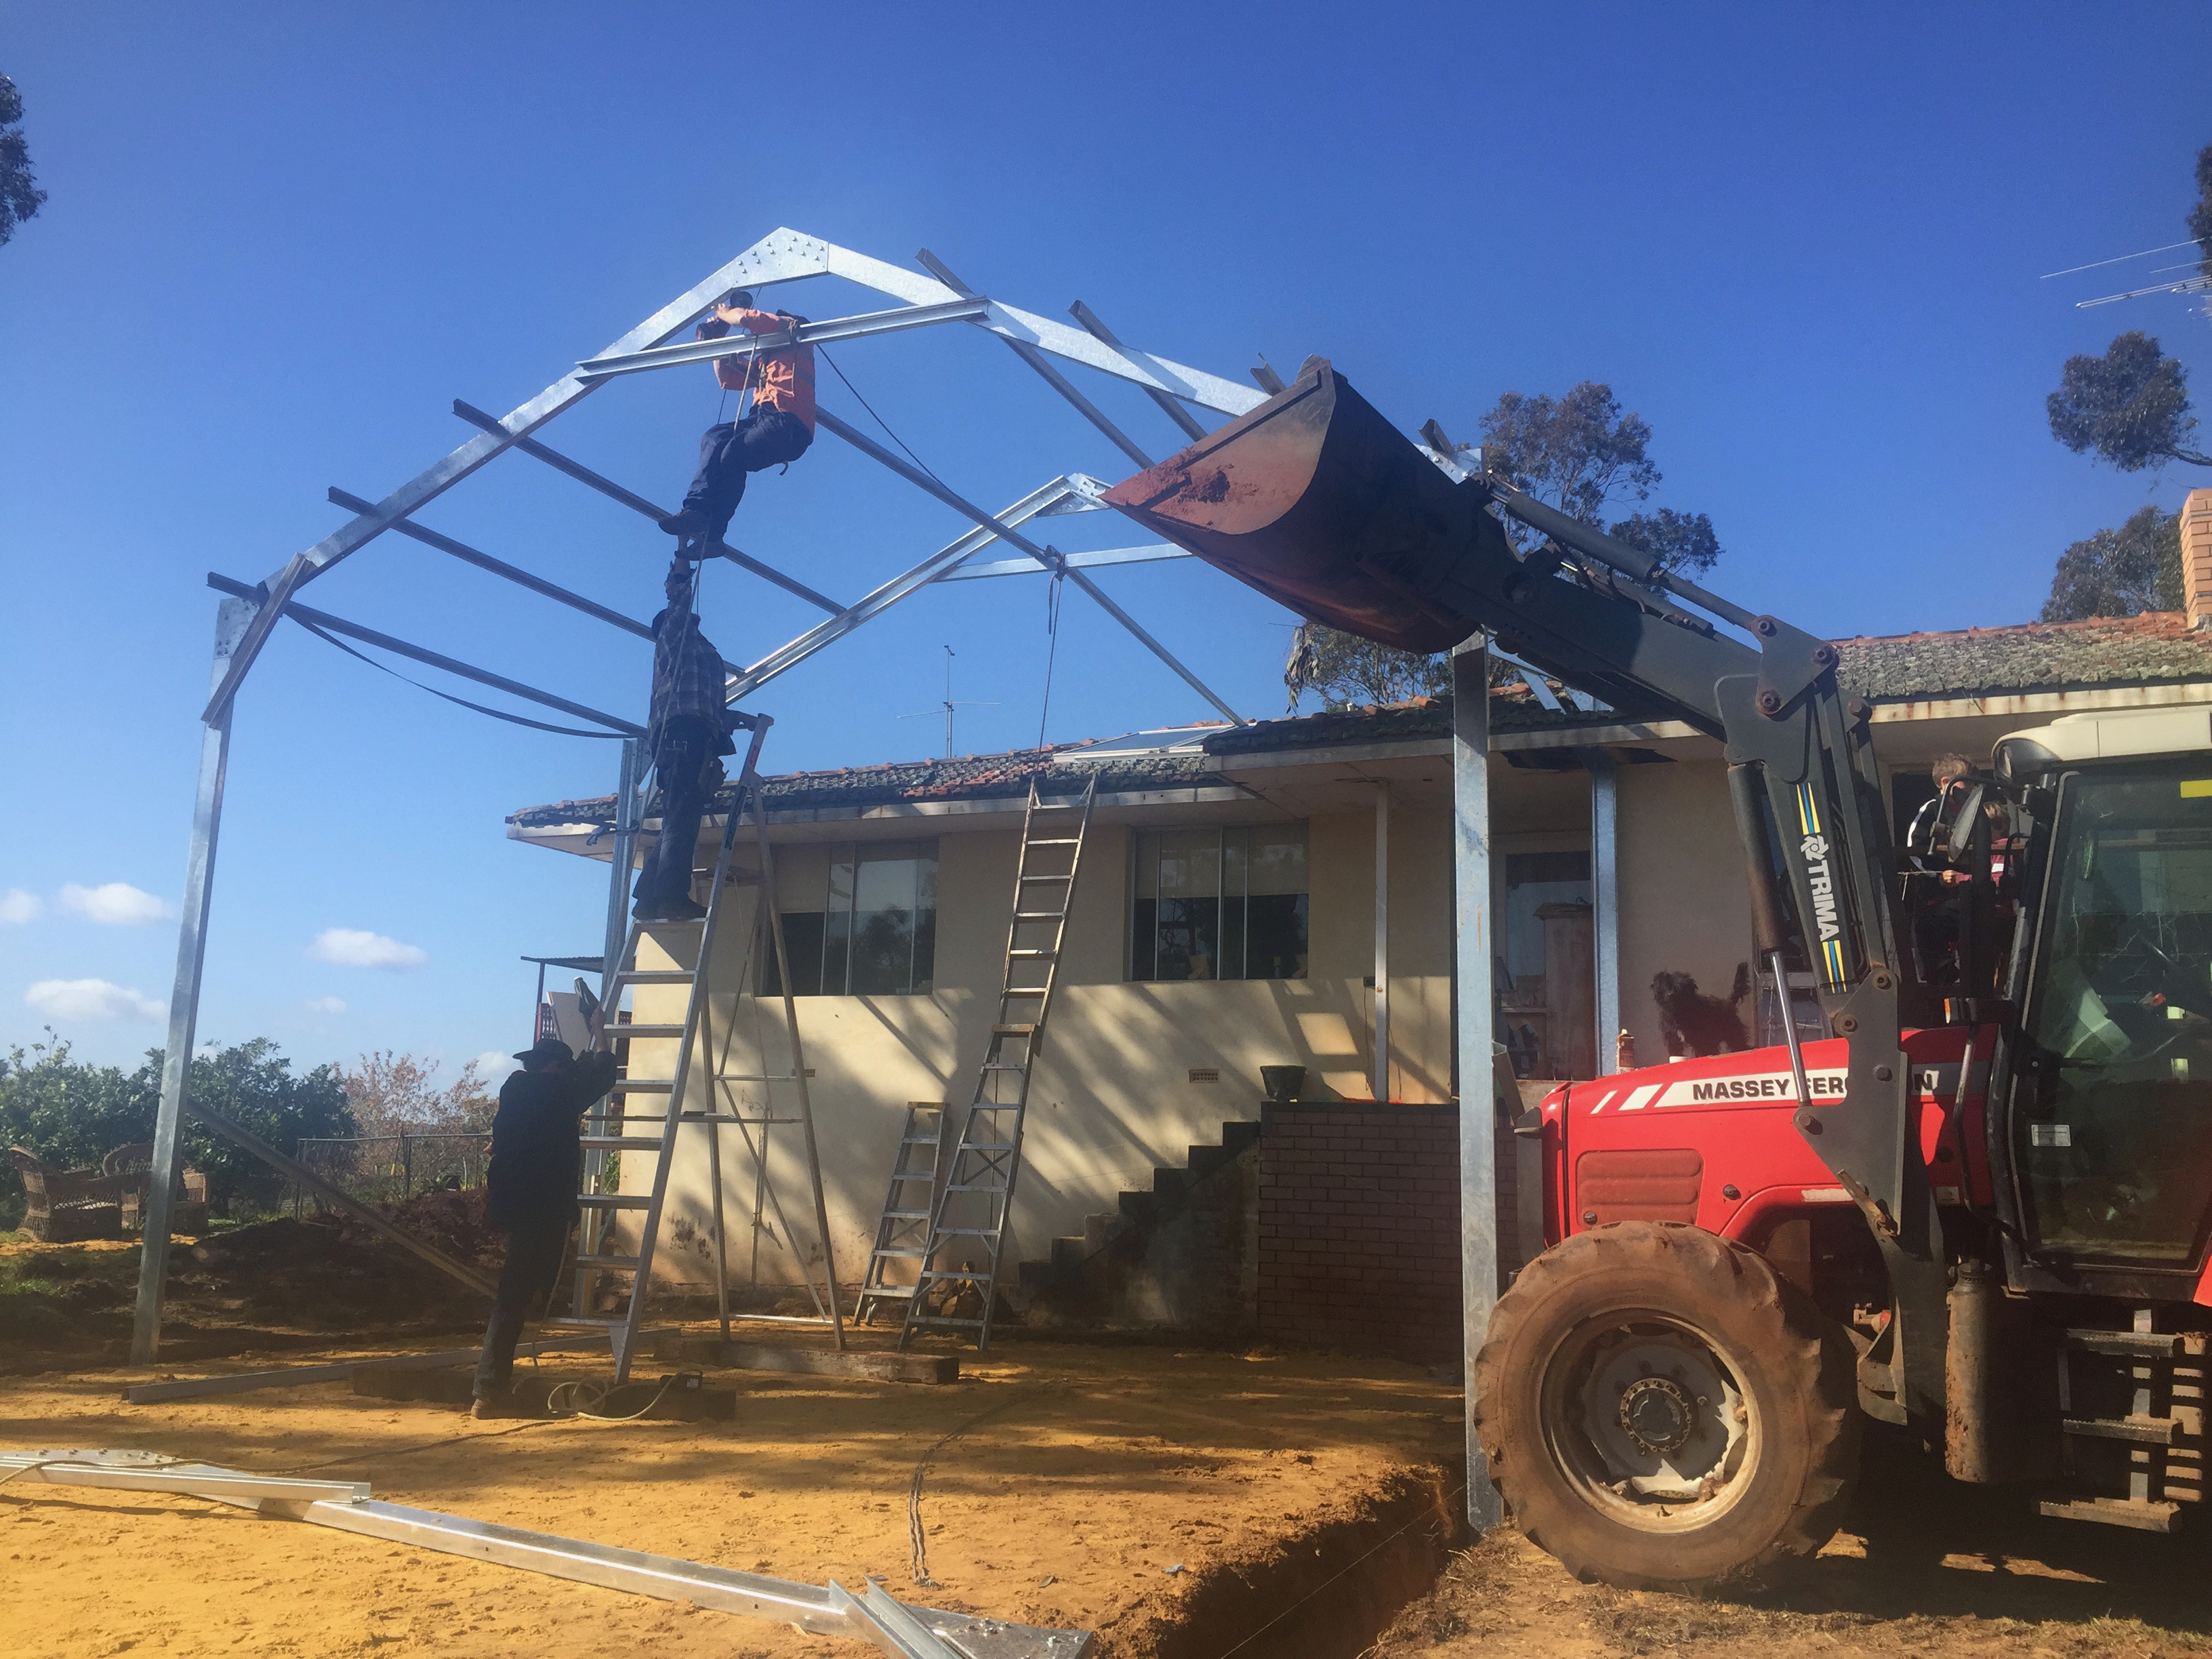
After the ‘hat’ was securely in place, we built a brick plinth for the bales – an extra measure to keep the ‘feet’ dry. Then it was time for the fun to begin!
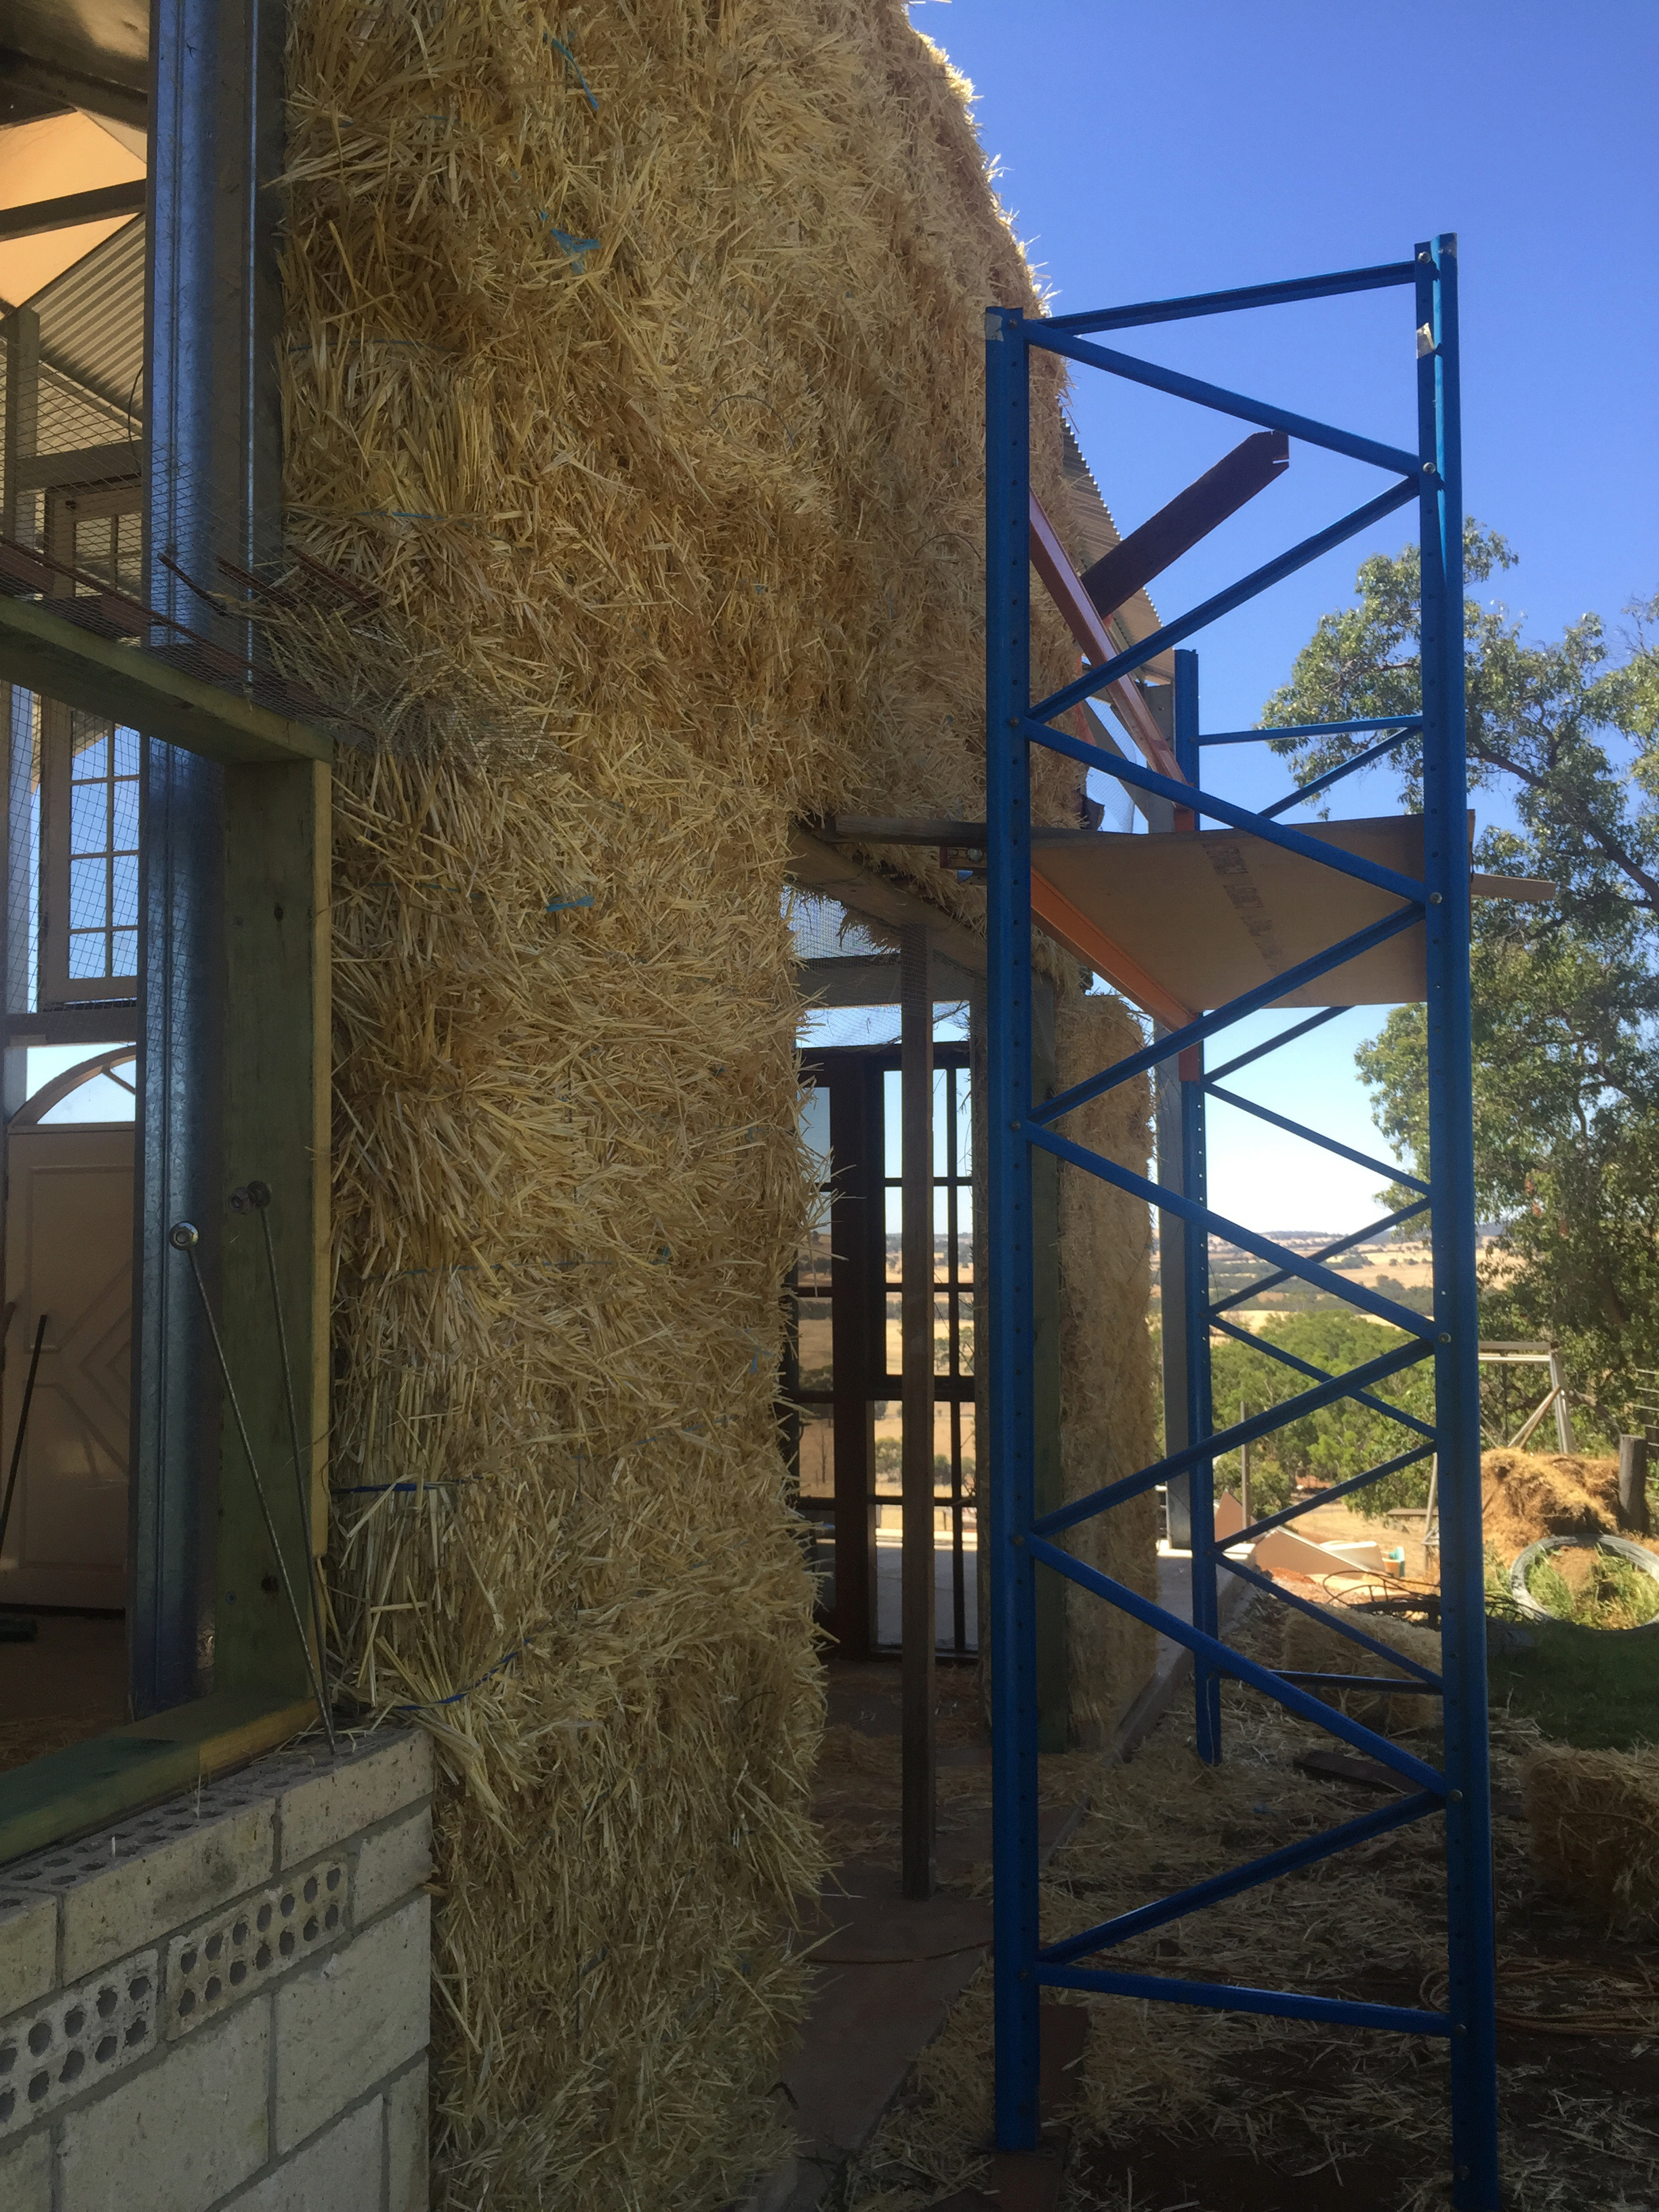
We enlisted the expertise of straw baler Dave Morris (Strawtegic), who had built many homes with the technique, and displaying his complete lack of acrophobia, Dave (literally) swung into action, stacking and wiring the bales together with ringlock. Taut wires and straight stacks were of prime importance, and the bales, which are by no means perfect, must be as vertical as possible. Luckily we were only using our bales as infill walls, and they are not structural – which although completely possible requires a bit more dedication.
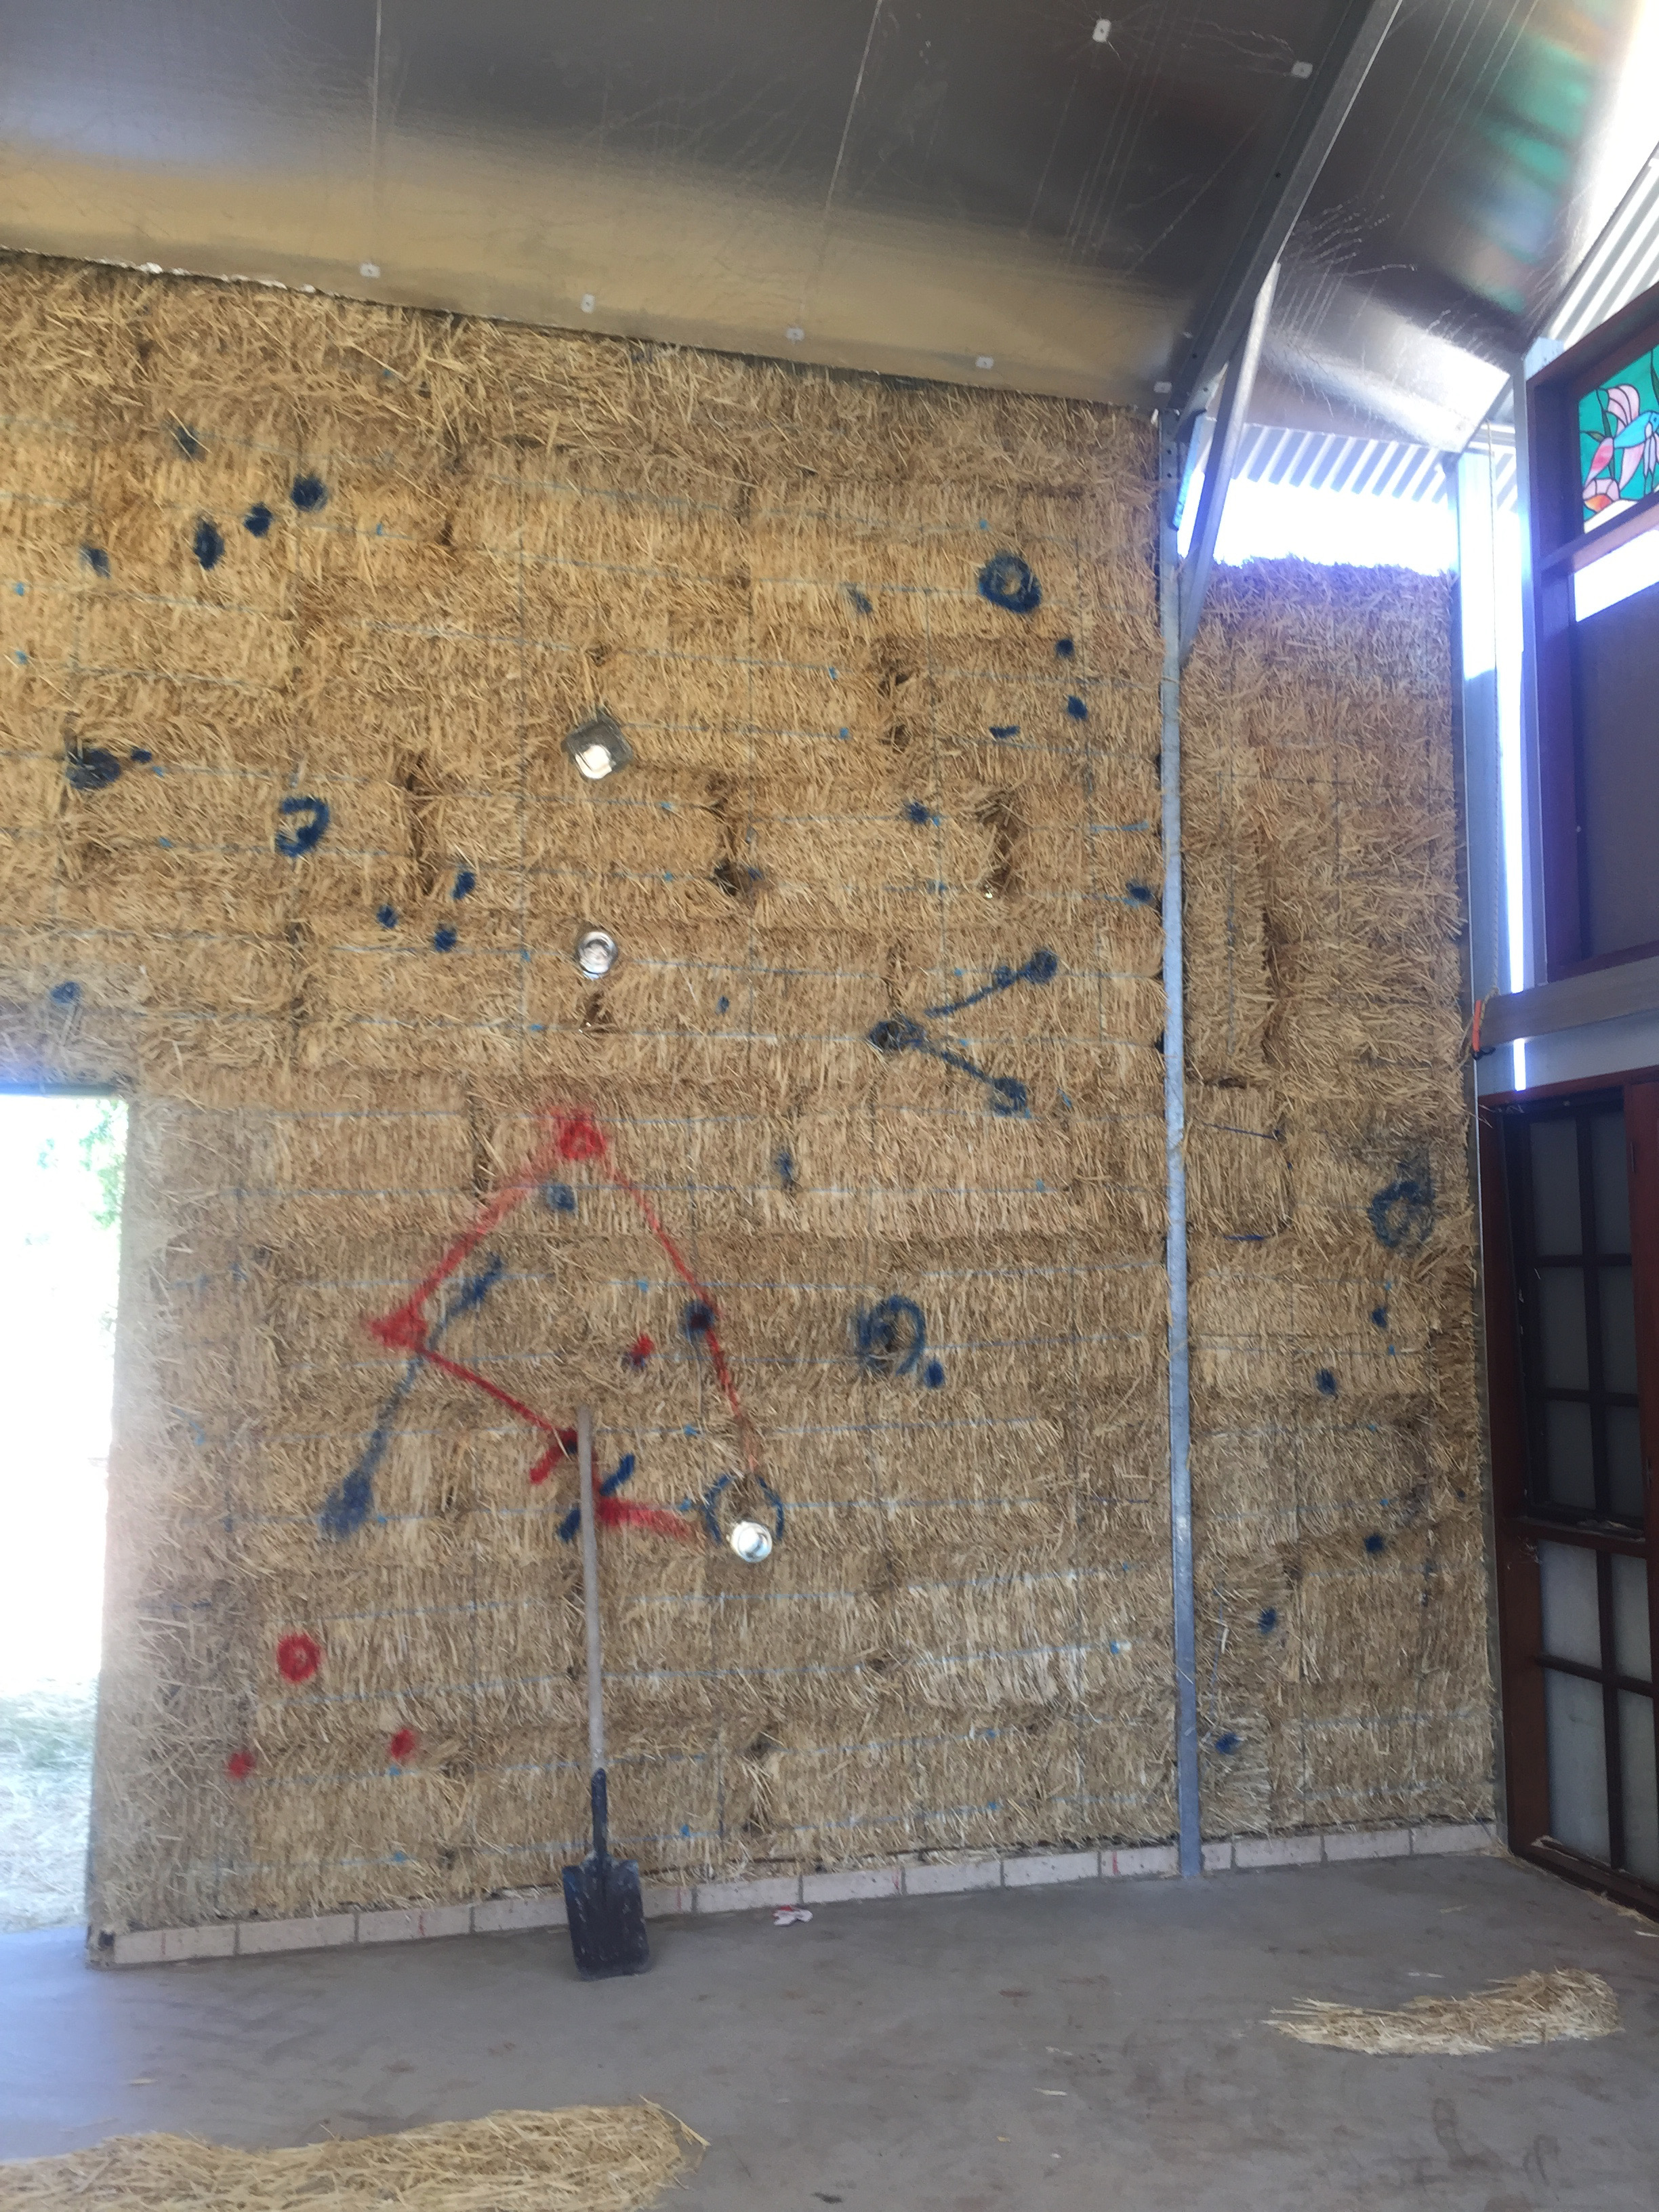
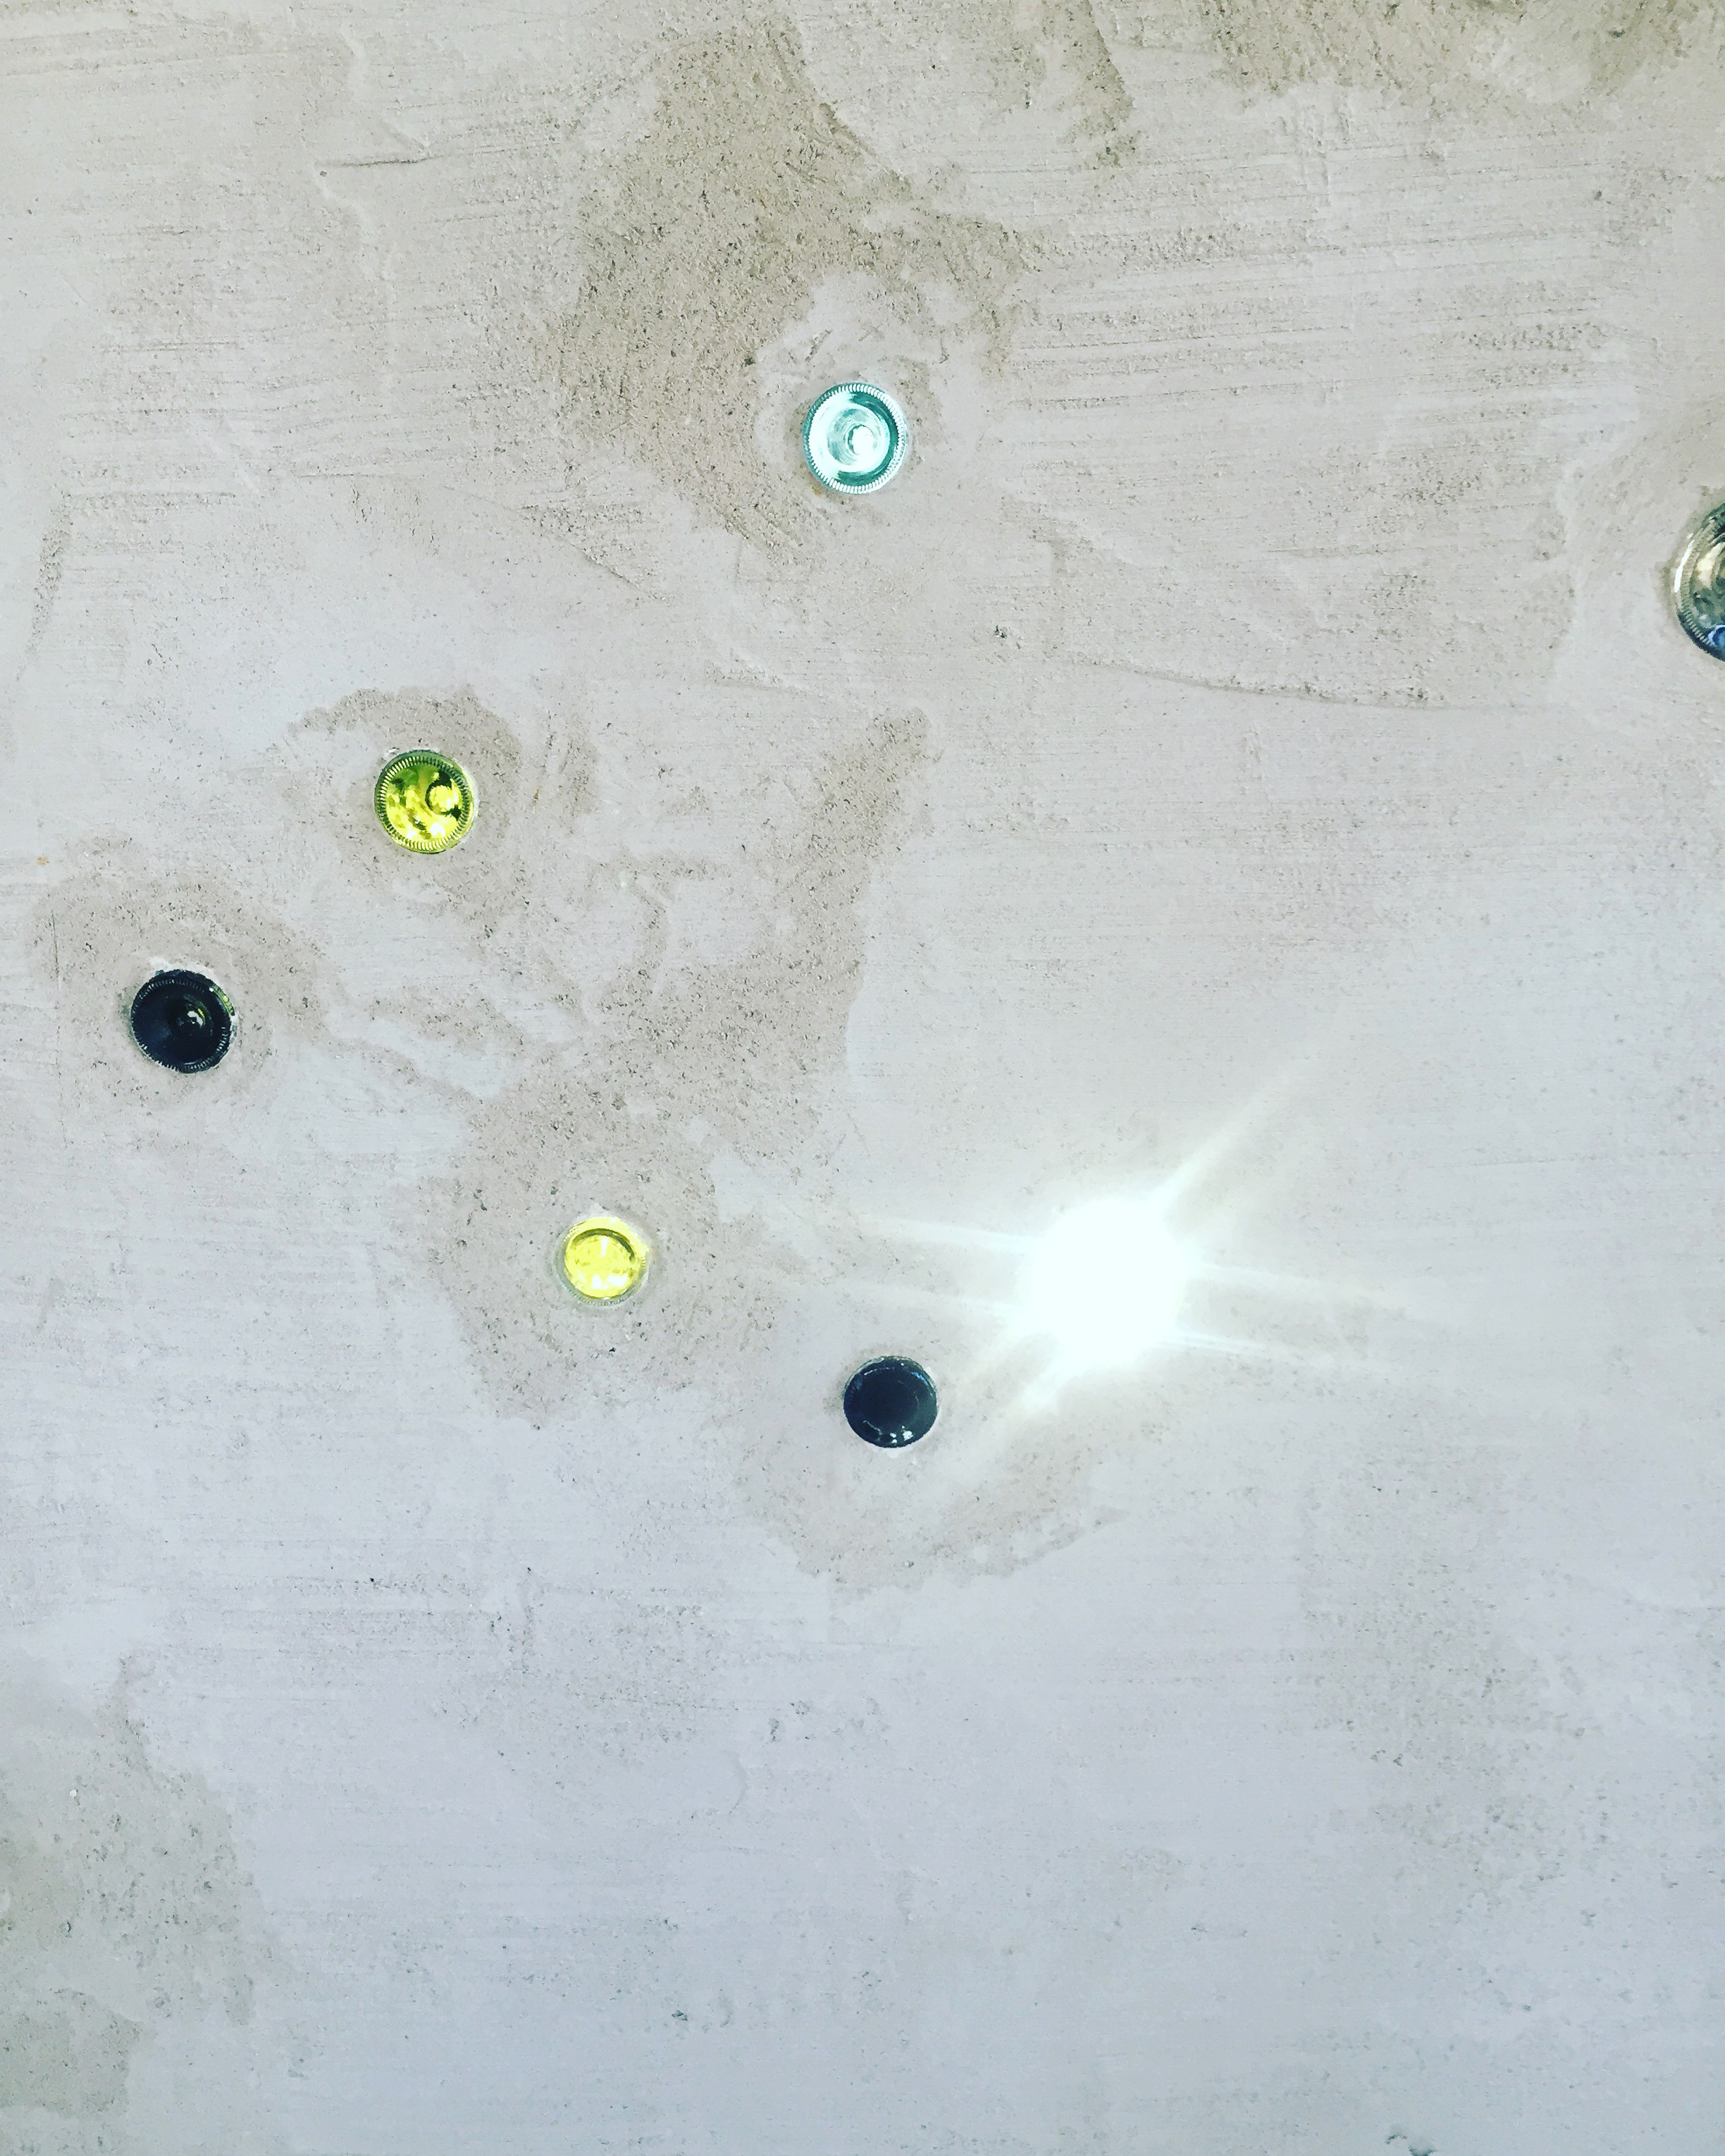
Once the stacks were in place, I tested Dave’s patience with my last minute proposal to add bottle bricks to break up the walls, adding light and some texture. Dave duly whipped out his chainsaw and swung once again from the ceiling, weapon in hand, to make holes just large enough for my end to end bottles and glass jars to be poked through. Acknowledging the lack of precision available I opted for a creative interpretation of the star map of the sky that evening, marking it up with spray paint as I referred to my ‘Night Sky’ app.
Next we were ready to spray the first coat – a mix of lime putty, water and sand. This set the straw inside and out, and after this we waited a few weeks for it to dry. This stage is traditionally done by hand, but a sand sprayer certainly sped up the process! Being January the heat dried the render quickly – great time of year to straw bale as mentioned before – water is your enemy!
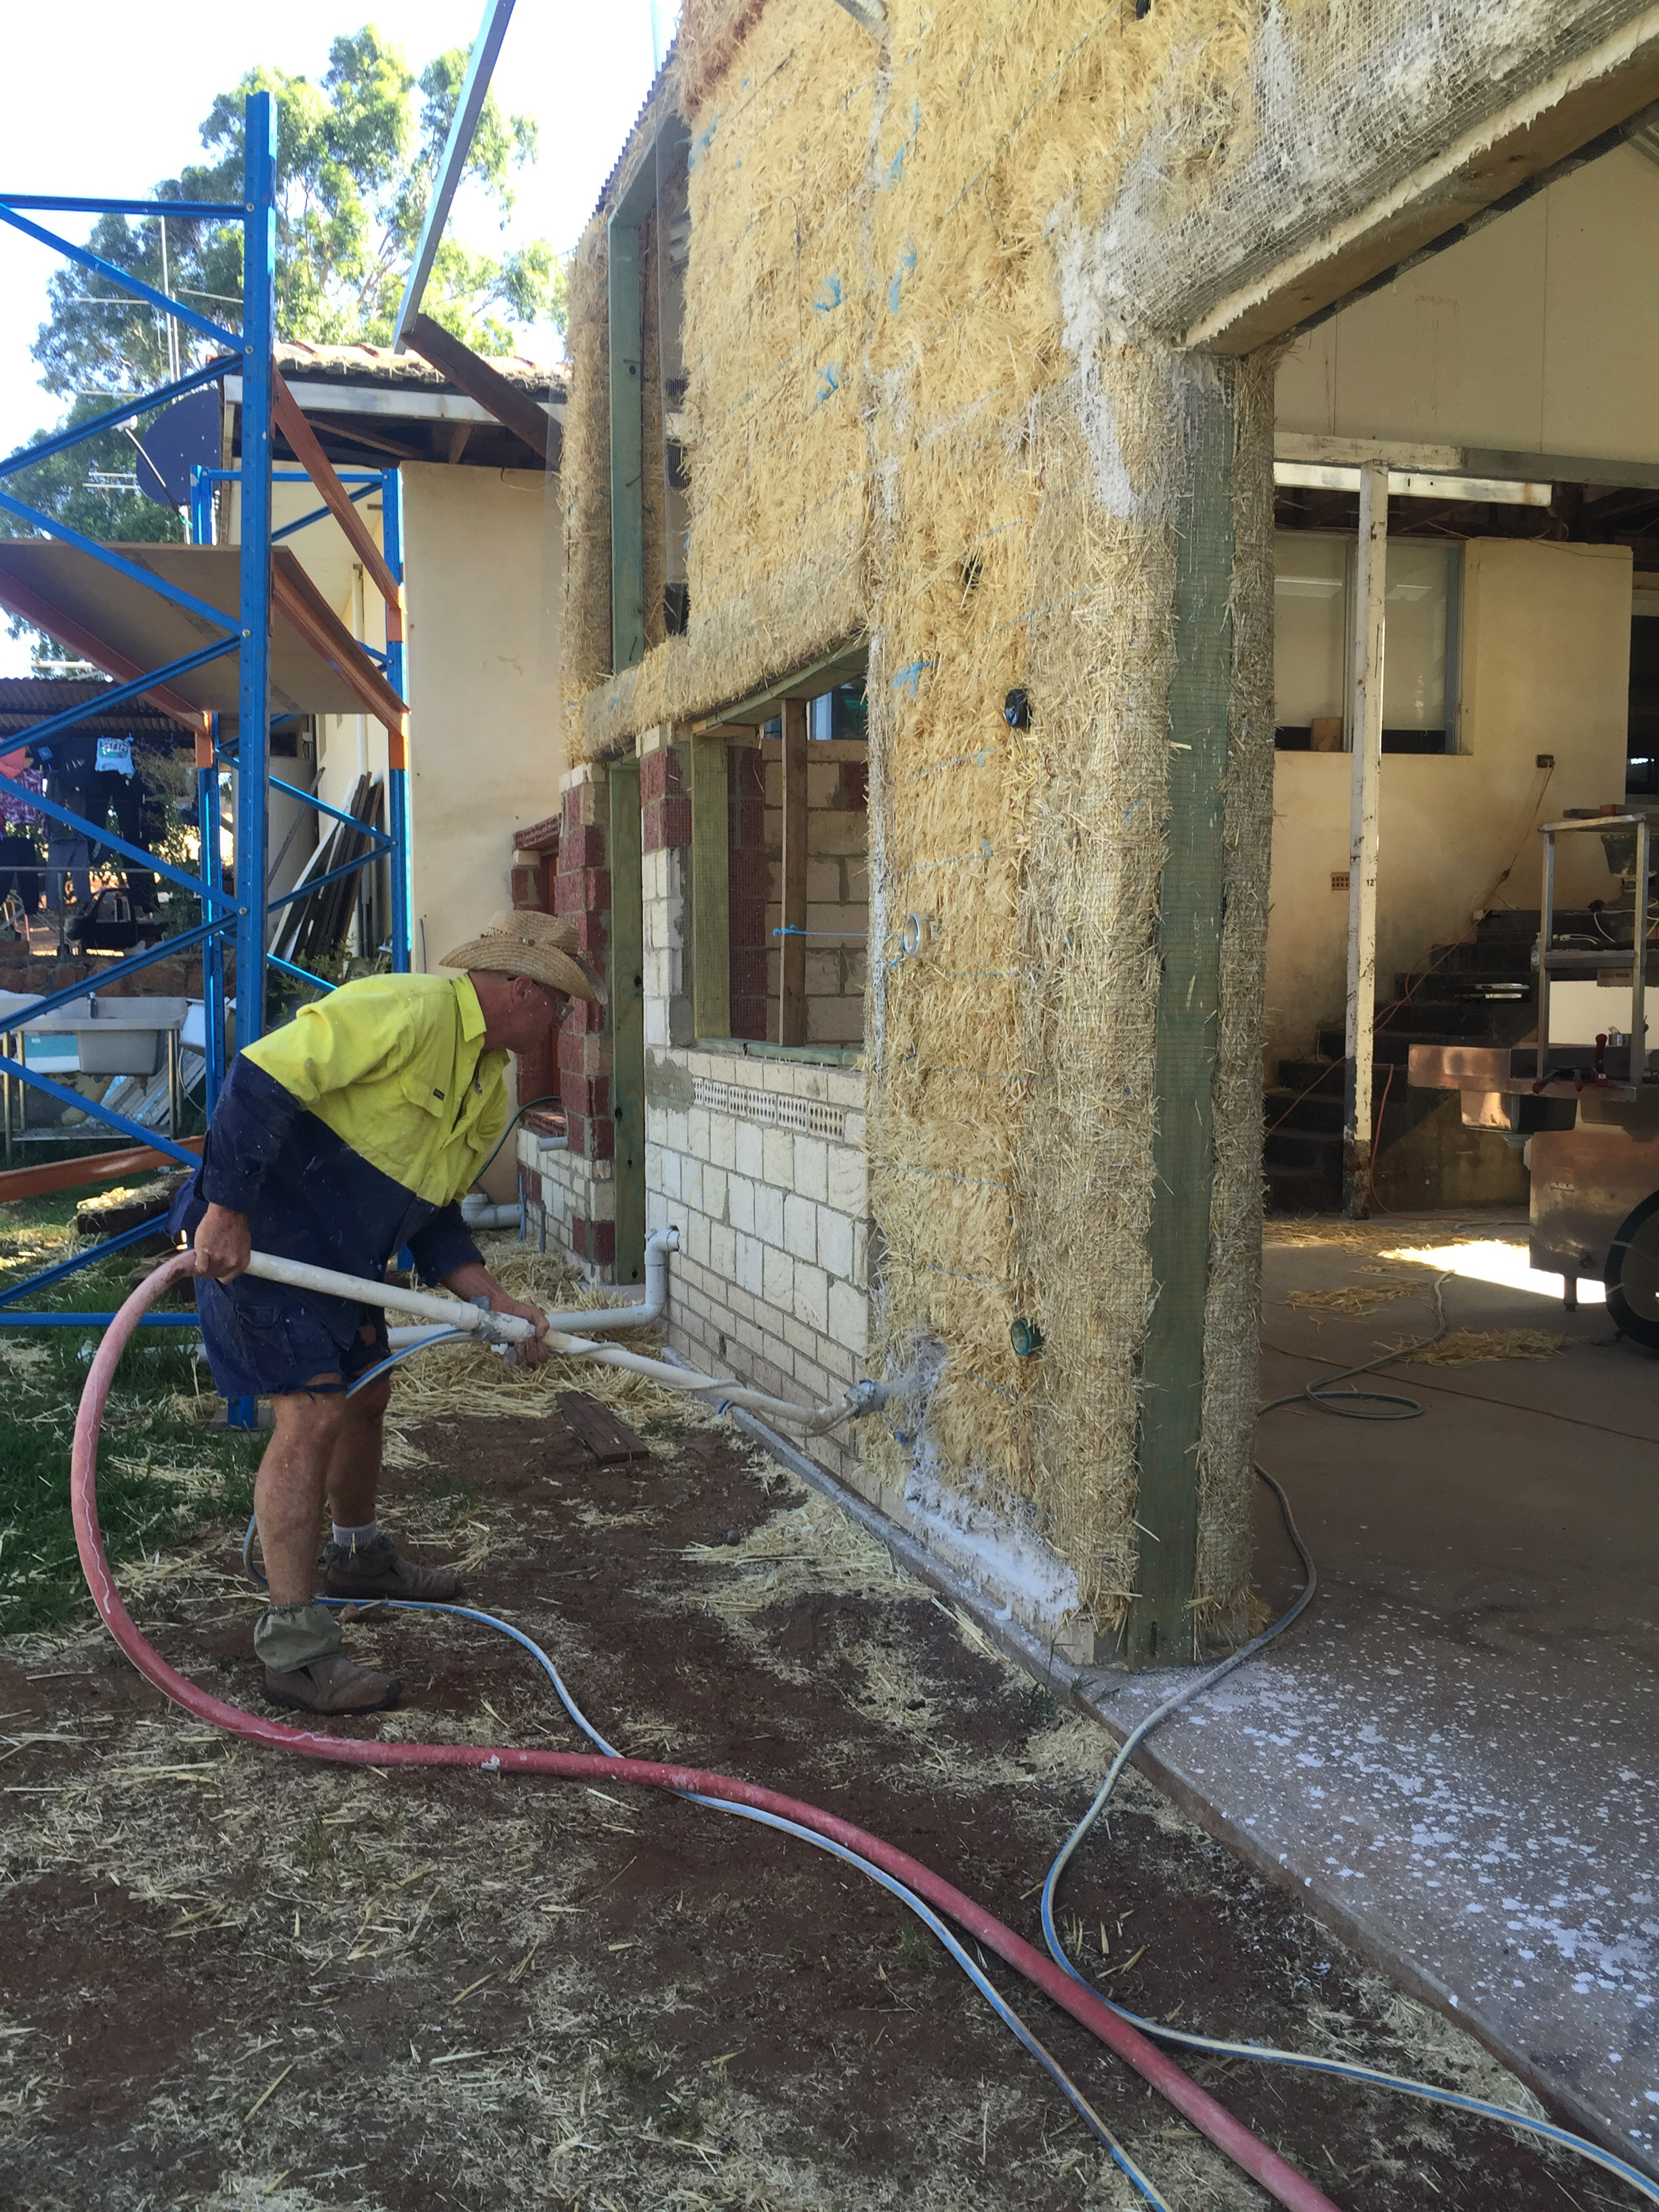
In March we sprayed another coat of the same coarse sand and putty mix. Giving the coats more time to dry.
Finally a plasterer mate of Dave’s came up to do the top coat, for which we used a fine white sand base inside and a yellow builders sand on the exterior, which matched the render on the existing house.
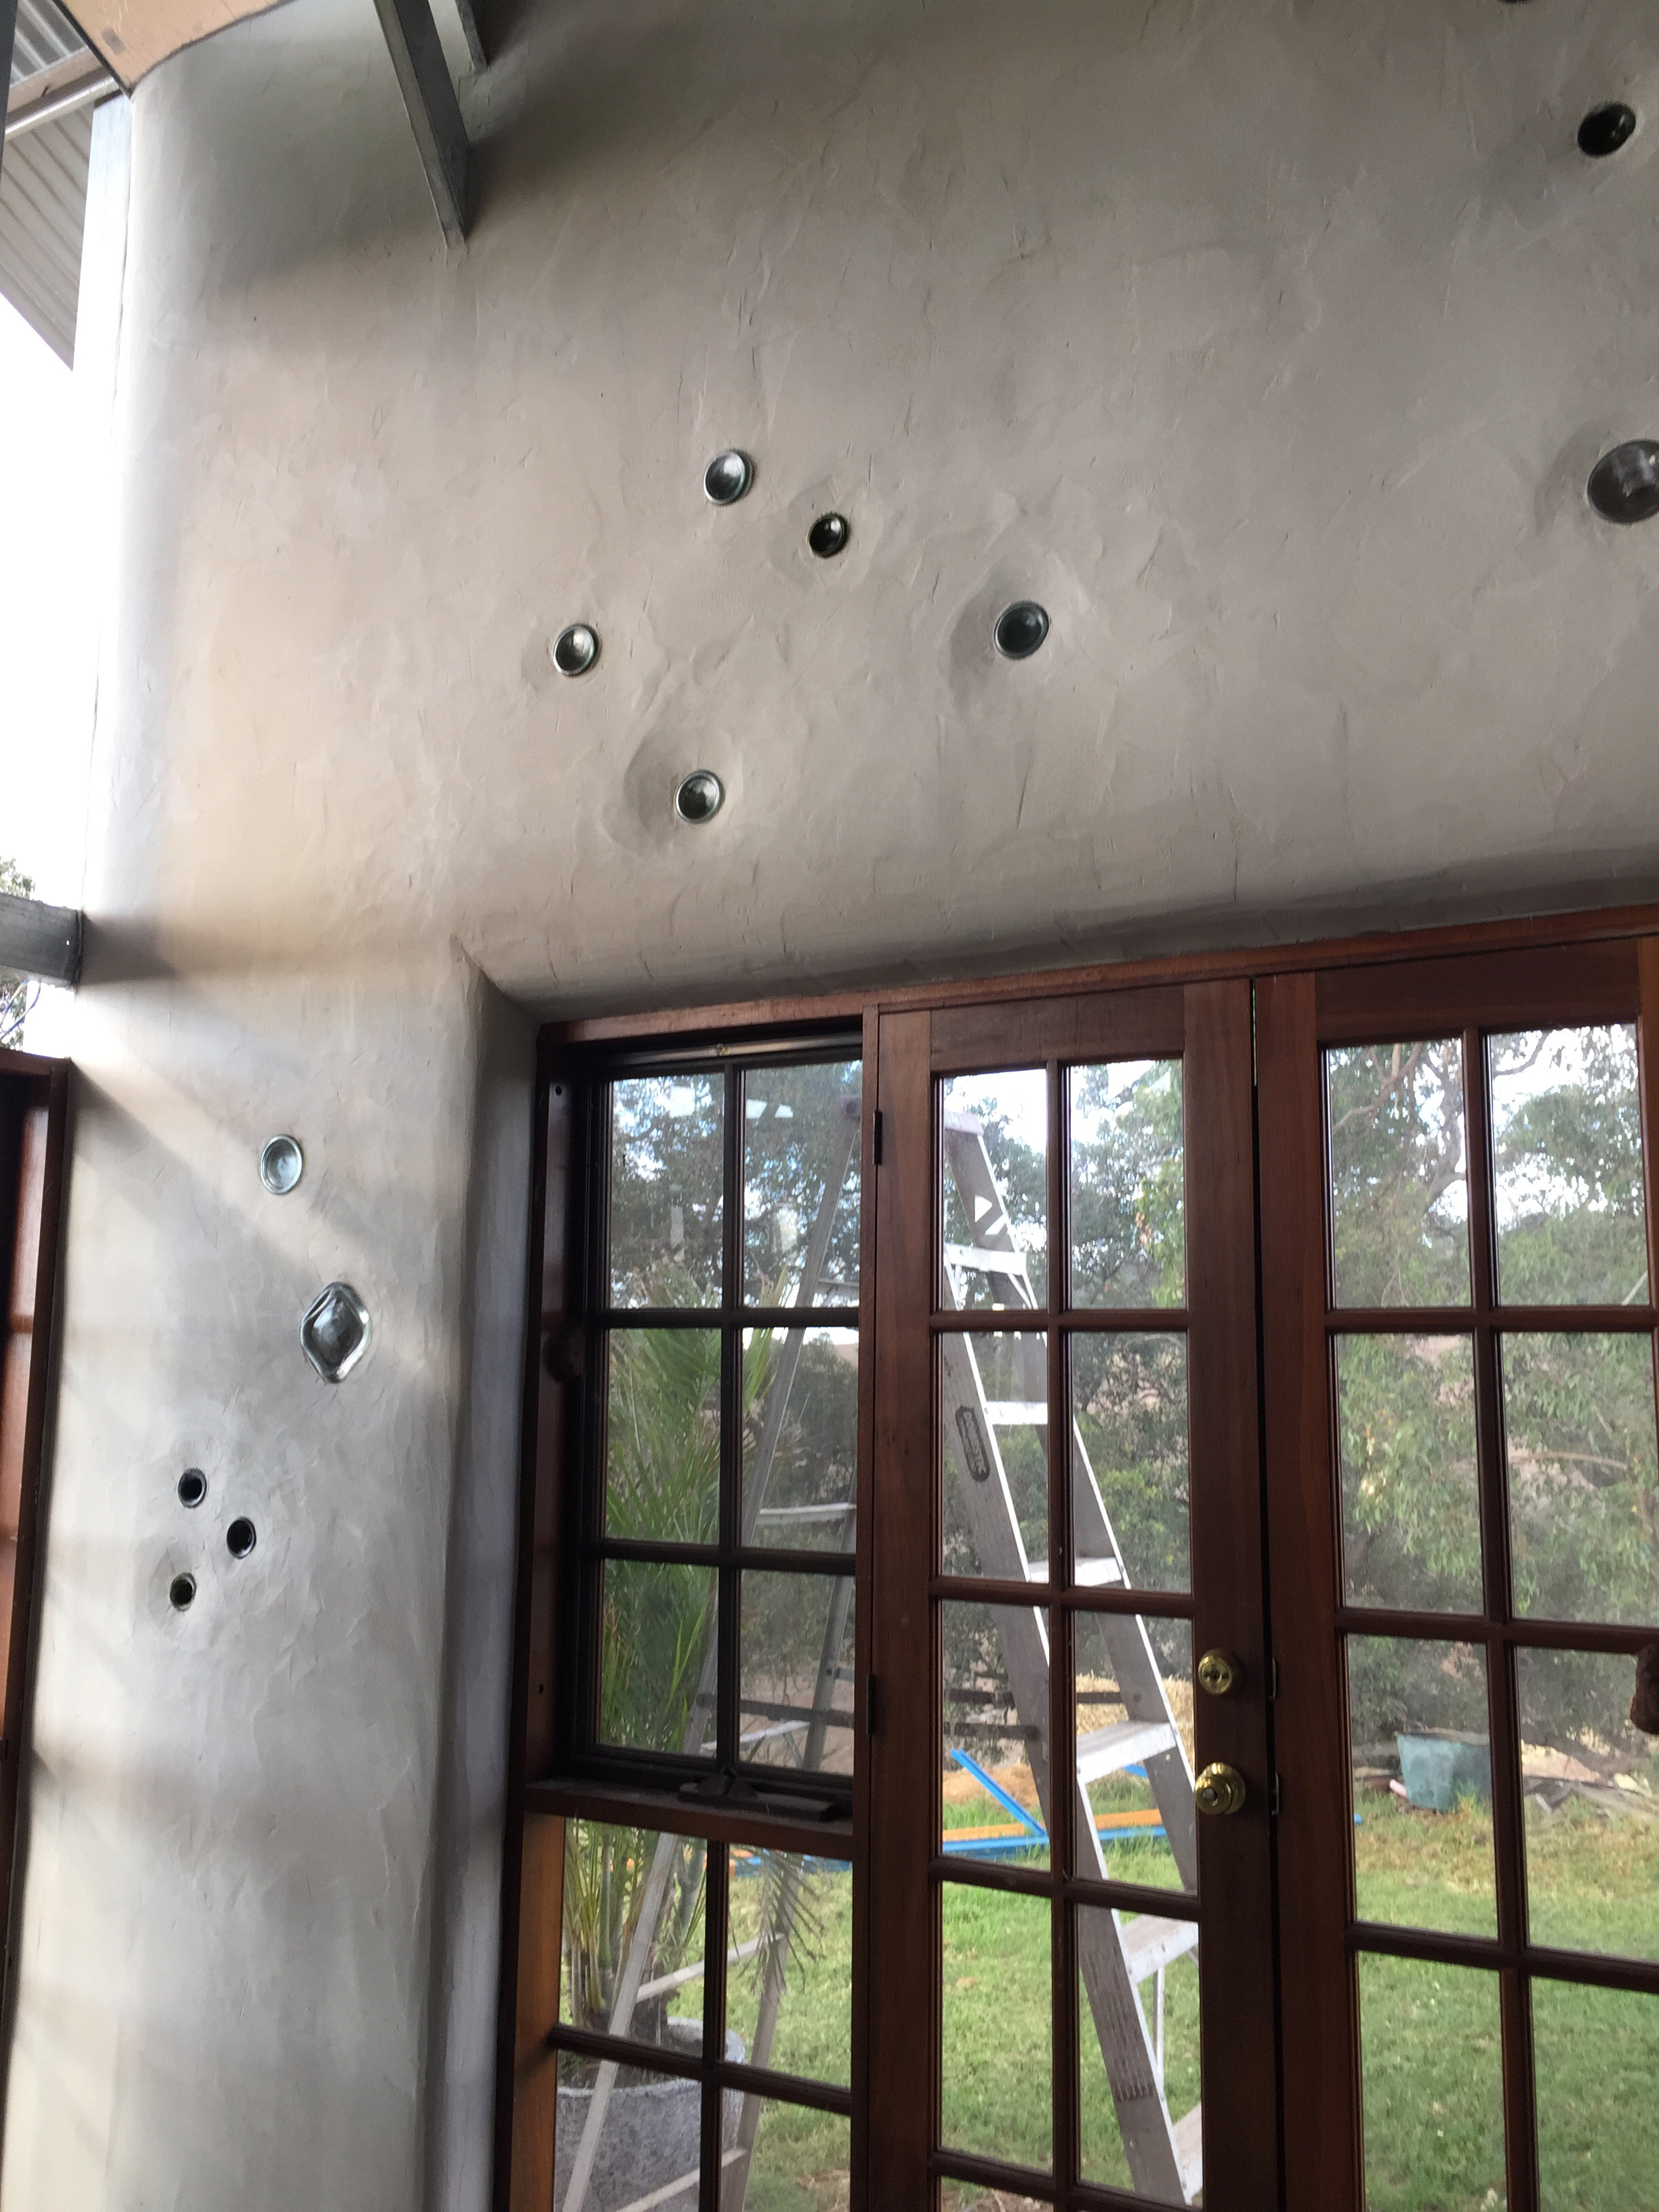
Here’s the result! I particularly love my bottle bricks, and the way the plaster is hand-tooled around them. ( Don’t forget to cover the glass in cooking oil so the render doesn’t stick!)
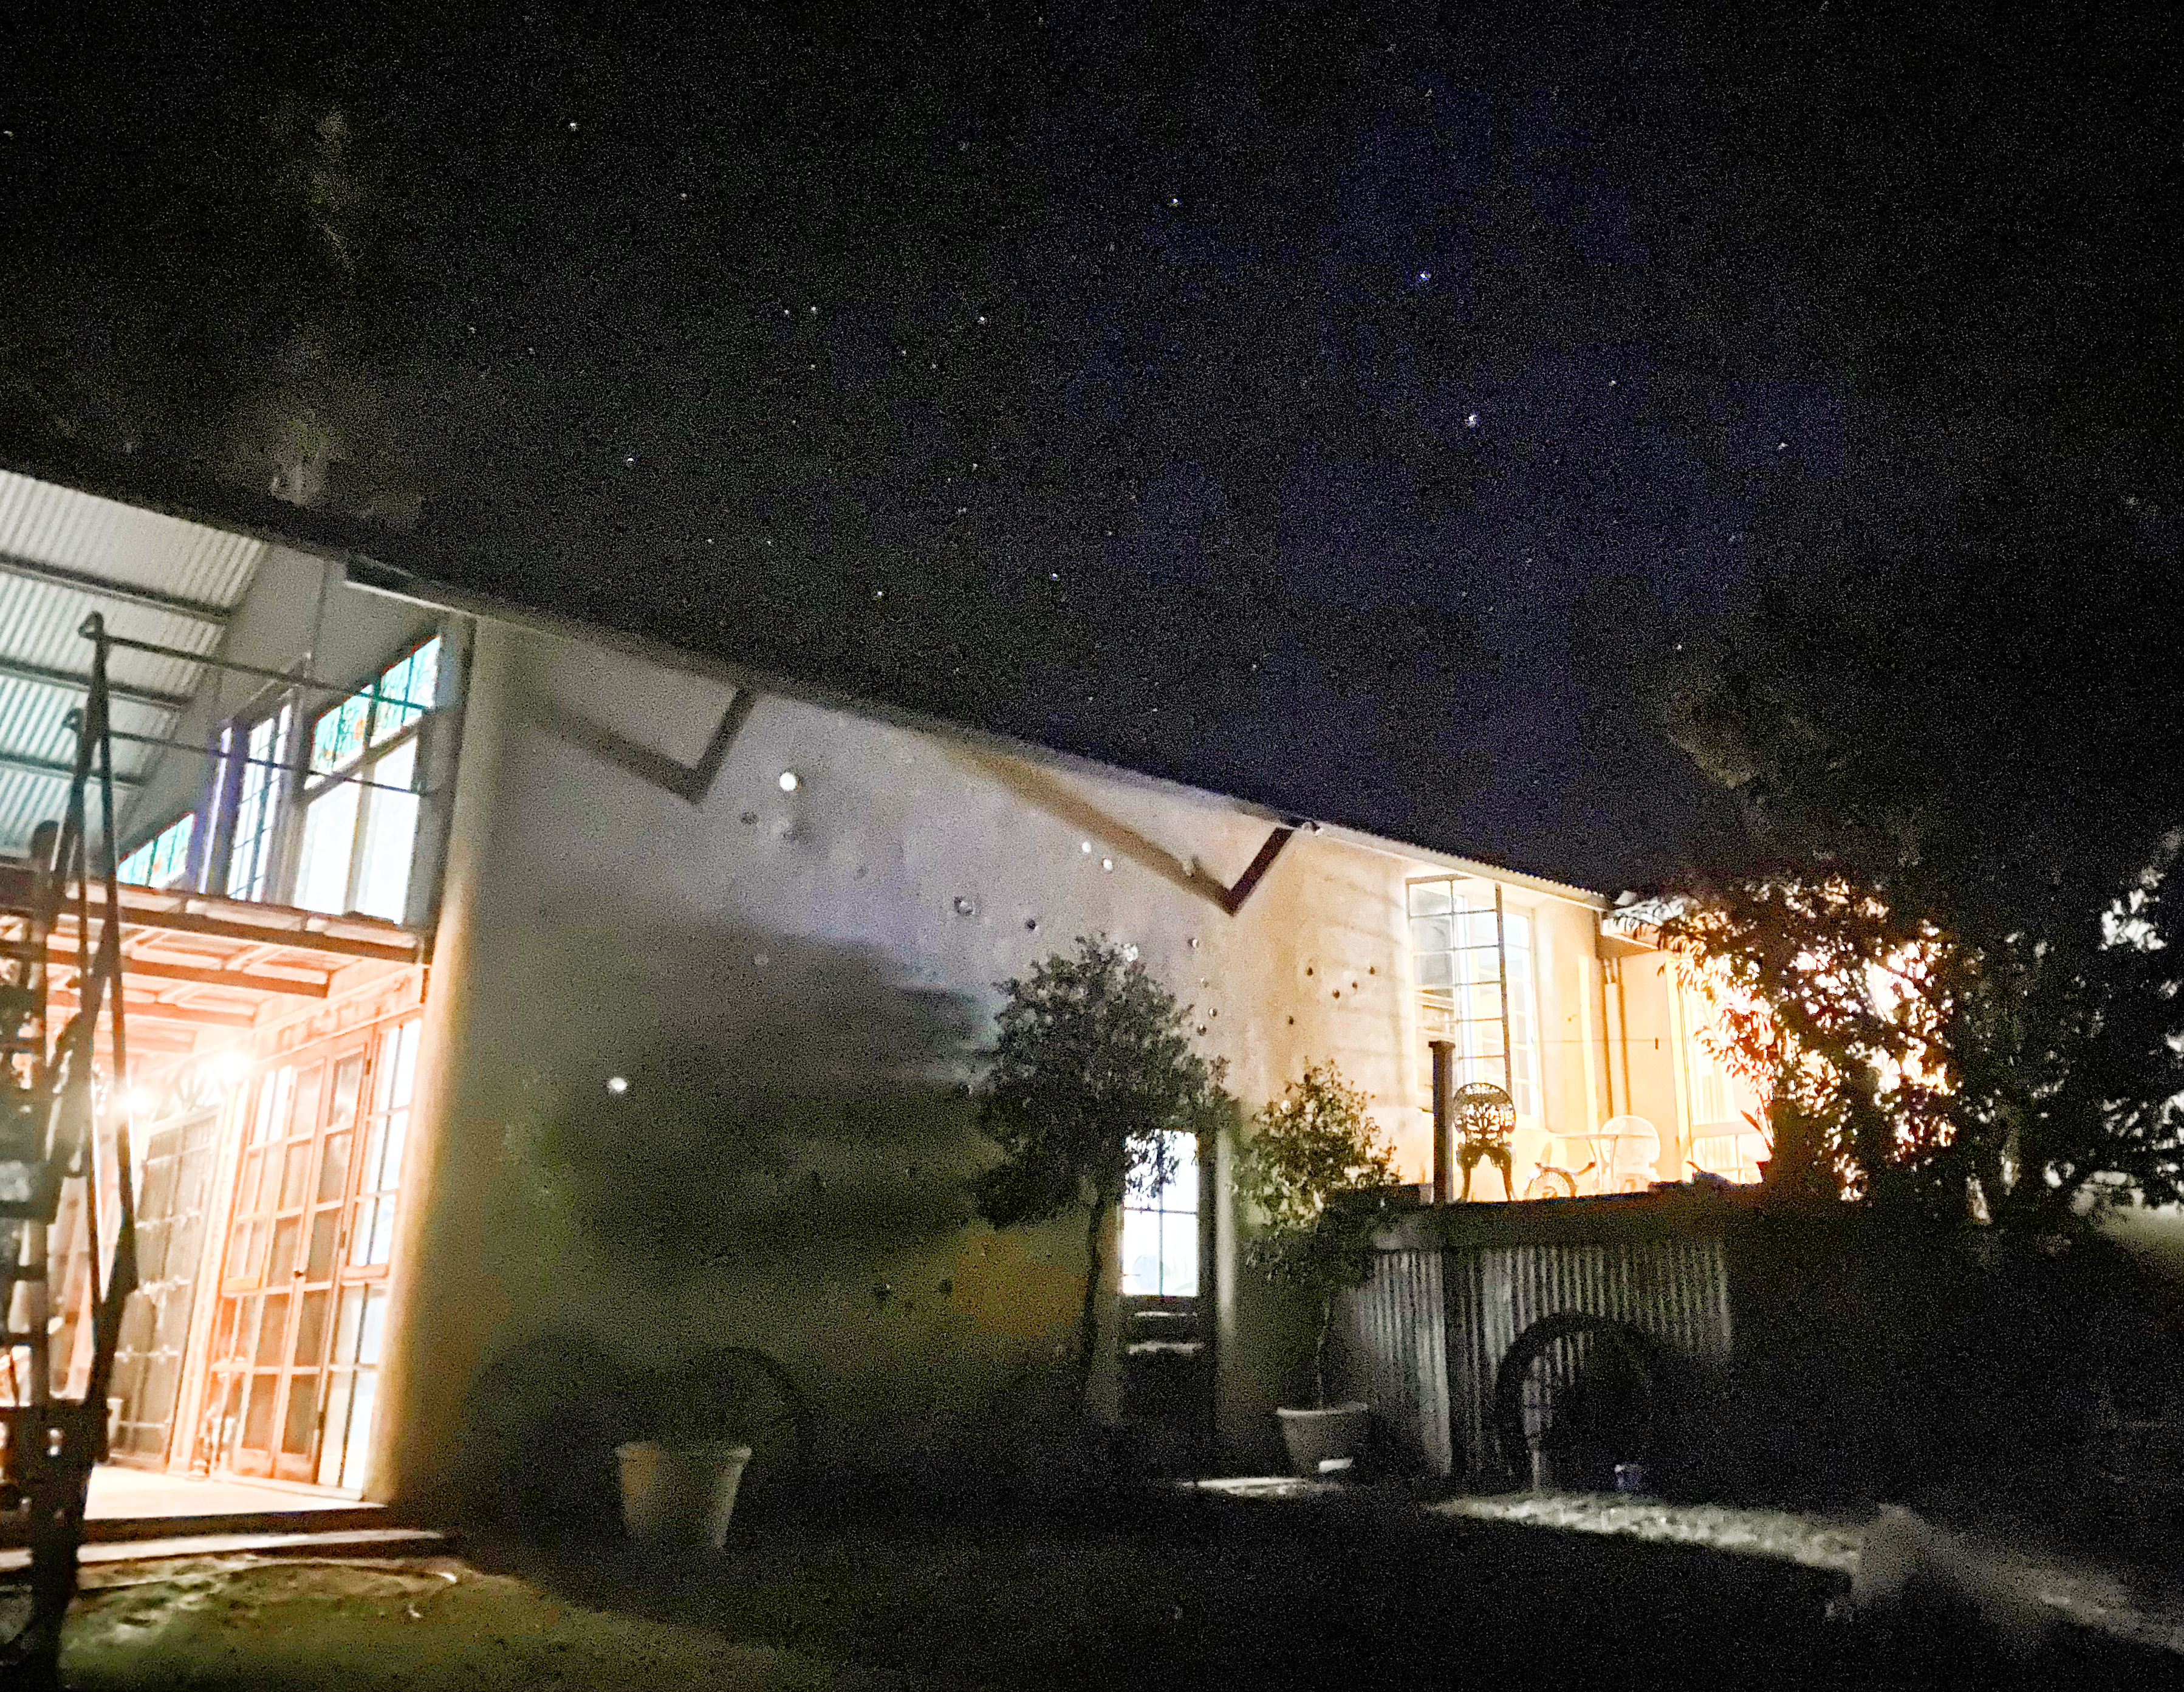
 The eastern view of the Hay Shed
There’s loads of information on the web about strawbale building and techniques, and many brave people opt to DIY. For me I was glad to have guidance, and there was still plenty to do to be involved.
In terms of functionality we were pretty pleased with the result. The house is a definite 15 degrees cooler in summer – even without air conditioning and remains warm inside if heated during winter. The recycled glazing we used as our north wall sacrificed some of the thermal qualities and one day when we replace them I anticipate less temperature loss. We haven’t had a problem with mice or rats eating the walls, (so far as we know) and being a farm there’s generally plenty around and as yet no threats from puffing fairy tale wolves either.
Our family were also relieved to hear that the fire testing commissioned by Ausbale (the Australian industry group for straw bale building) meets the current (Bushfire Attack Level) BAL-29 rating and strawbale walls are allowed to be built in areas with a BAL rating up to BAL-29. Because the straw is so tightly packed there’s very little oxygen to facilitate burning ( although there was that one incident with the arc welder that we wont mention. Suffice to say that if metal is in contact with the straw, don’t try to weld a beam to it.)
The bottle bricks turned out beautifully – and an surprise bonus is the night time view of the lights shining from inside out… my favourite sight as I return home and make my way up our driveway.


